Your Guide to Starting Seeds Indoors for Strong Plants
- Admin
- Gardeners Diary
- 29 Nov 2025
-
25views
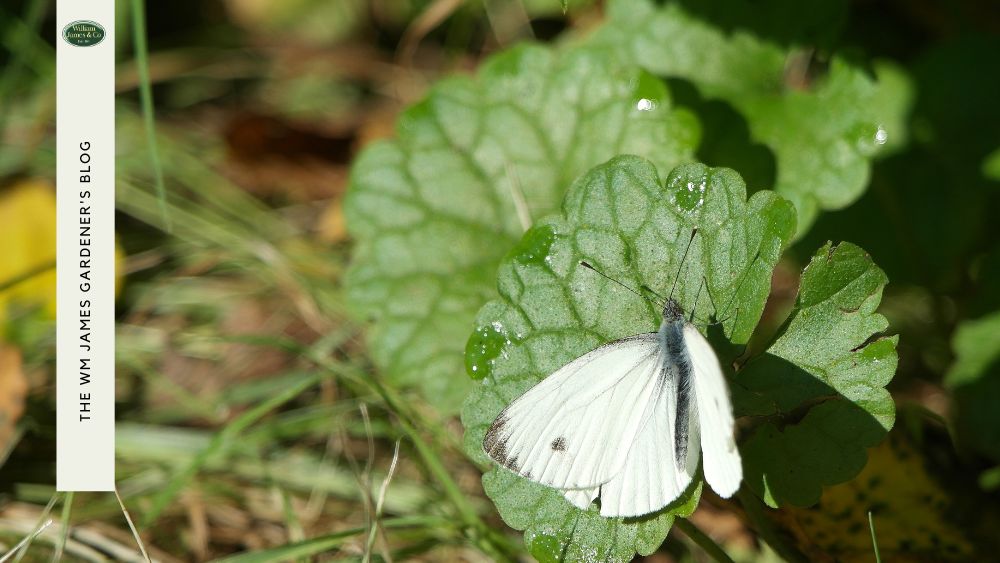
Starting seeds indoors is a necessary task for those hoping for a successful harvest come spring and summer, while giving you a chance to get growing before the season fully begins.
But how do you start seeds indoors?
We'll cover it all in this guide.
A Short Summary…
- Start most seeds 6–8 weeks before your last frost, typically from late February to early April in the UK.
- Use peat-free seed compost, trays with drainage holes, and maintain temperatures around 18–21°C for strong germination.
- Keep compost moist, but never soggy. Water gently using a fine rose or capillary mat to avoid washing seeds away.
- Once seedlings have 2–3 true leaves, pot them on into larger containers and provide plenty of bright light or LED grow lights.
- Harden off seedlings gradually, before transplanting outdoors to protect them from temperature shock and wind exposure.
Some varieties of veggies, fruit, and herbs need a bit of extra help when it comes to their heat needs and germination before being left to their own devices outdoors.
It allows them to be protected from the elements and pests for that extra period to ensure happy plants and rewarding growth.
In this guide, we'll take you through the whens and hows, as well as aftercare for your seedings, and extra tips to make the whole process smooth.
To help you prepare for your highest yield yet, let's get into it!
Before we do, though, below is a selection of equipment and tools needed for sowing indoors. Shop with us today and get free UK delivery* if you need an upgrade or fill some gaps in your garden tool box!


When to Start Seeds Indoors
First things first, you need to plan when you'll start your indoor seeds. A variety of seeds can be grown indoors, and some will have different requirements, so you should always go by what it says on the packet.
Discover Our Guide to Growing Herbs Indoors
You should start most vegetable seeds indoors 6 to 8 weeks before the last expected frost date in your area. This gives seedlings enough time to establish before being hardened off and transplanted outside.
A quick Google search should help you determine the average date of the last frost where you live. Here are some examples according to the Last Frost Date:
- Somerset: 26th April
- Derbyshire: 10th May
- Lancashire: 8th May
In the UK, this typically means sowing seeds from late February to early May, depending on your region and crop type.
Some examples include:
Read Our Ultimate Guide to Growing Root Vegetables
But as we said, it's best to go by the information on the packet.
How to Start Seeds Indoors
You now know when to start your seeds, but what about how? Below is the equipment list you'll need, along with a 4-part step-by-step guide on just how to get your seeds going.
What You'll Need
- Seeds (choose your favourite plants and go from there!)
- Seed trays and modules
- Peat-free seed compost
- Garden trowel
- Dibber
- Plant labels
- Watering can or capillary mat (for bottom watering)
- Propagator lid
- Thermometer
- LED grow lights (optional if light is limited)
Step 1) Know Your Timings and Set Expectations
- Avoid starting too early
- Wait until you can provide the right conditions
You know a bit more about timing your seed sowing, but it's worth noting that certain veggies like a bit longer indoors before transplantation, like chillies and aubergines.
You should also avoid starting too early.
We know those green thumbs are itching, but it's important to allow your plants access to adequate sunlight and space. If you aren't yet prepared or can't provide the right conditions, hold off until you can.

Step 2) Prepare the Containers and Compost
- Choose trays and pots with adequate drainage
- Use peat-free compost and moisten it before potting
- Break up lumps to create a smooth surface
First, you need to choose your trays or pots you plan to work with. We have a selection of professional seed pots and trays, perfect for growing healthy plants in your home — they're made from recycled and recyclable plastic, too!
Discover the Best Soil for Growing Vegetables Sustainably
It's important that whatever pot you choose, it must have drainage holes to keep your seeds healthy, happy, and not sat in still water.
Next, you need to choose your compost. We recommend a peat-free compost, which is fine in texture, free-draining, and low in nutrients — ideal for sowing seeds.
You should then moisten the compost just slightly before using a trowel to fill your containers. Fill the compost to just below the rim to save space for watering.
If you see lumps, do your best to break them up to help smaller seeds sit evenly. You're aiming for a level surface.
Step 3) Sow Your Seeds
- Soak seeds if necessary
- Use a dibber to plant seeds
- Lightly cover seeds with compost
- Label all pots
It's time to start sowing your seeds. It may be beneficial for you to soak large seeds with a thick coating (like beans, peas, and beet seeds) before placing them directly in the compost to help speed up germination, but this isn't necessary for small- to medium-sized seeds.
Consult your packet to understand the depth and spacing needed for your specific seeds, then use a dibber to make the dent in your compost for the seeds to sit.
After sowing, cover the seeds lightly with a fine sprinkling of compost (unless the packet says leave exposed). This ensures moisture is retained and seeds are protected.
Label every pot with the seed type and the date of sowing. If you're extra prepared, write the date you hope to transplant outside.
Learn How to Achieve Vegetable Container Success!
Step 4) Choose the Right Environment
- Most seeds germinate between 18-21°C
- Keep seeds in a bright spot and use a propagator lid (be sure to ventilate)
- Use grow lights if necessary
- Use your capillary mat or water with a watering can
Now that your seeds are potted and ready to go, you need to create the perfect environment for them to grow and thrive.
Most seeds germinate best between 18–21 °C (depending on crop). Some can germinate at cooler temperatures, but more slowly.
If it's winter/spring and you don't always have the heating on, you need to provide the best spot possible for heat.
Place the containers in a warm, bright spot, like a windowsill with good light, a greenhouse, or use a propagator lid to retain heat and moisture.
Be sure to ventilate daily, though, to avoid condensation build-up and fungal problems.
If you need grow lights, set these up, too.
While seeds germinate, keep compost evenly moist, not saturated. Use a capillary mat to avoid strong water flow, which can wash seeds around.
Congratulations! You have now started your seeds indoors. Let's talk aftercare.
Aftercare for Your Indoor Seeds
- Keep the seeds in bright areas
- Water sufficiently
- Once the plants have 2-3 true leaves, transplant them to a separate, larger container or module
- Harden off seedlings before transplanting
As soon as shoots appear, remove covers and move seedlings into bright light (to prevent them stretching/legging). A south or west-facing window works, though in winter/early spring, supplemental grow lights may help further.
To encourage sturdy growth, don't be afraid to keep overnight temperatures a little cooler; this will get them prepared for their transplantation outside.
Other than that, water your shoots carefully. The surface should remain slightly moist, but compost must never be soggy. Good airflow can help with this, and if they're not near an open window, you can try using a small fan for part of the day.
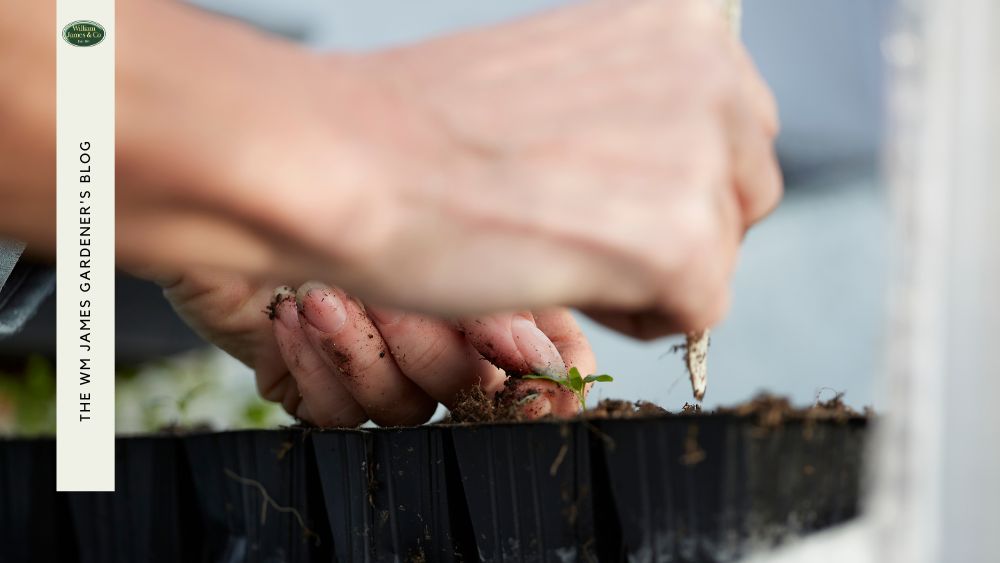
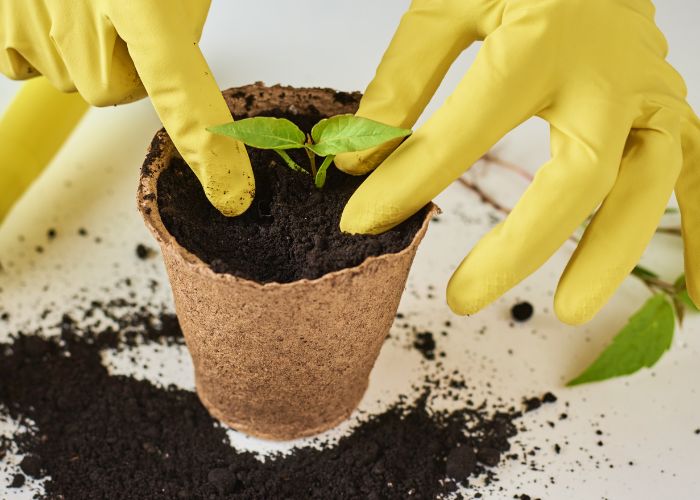
Once seedlings have 2-3 true leaves (beyond the seed leaves), you can either thin out weaker plants or transplant them into larger containers or modules. Handle seedlings by their leaves, not stems, and transplant into fresh compost.
If using modules, it may be possible to leave plants in those modules until planting out (saving plant stress). Choose a compost with slightly higher nutrients at this stage (but still not heavy).
At this stage, your seedlings will be ready to plant outside as soon as the last frost has passed (after a period of hardening off, of course!).
Extra Indoor Seed Starting Tips
If you've tried all this before and weren't able to grow strong seedlings, don't worry, it happens to us all.
But to avoid the same mistakes being made and another batch of weak seedlings, below are some tips and tricks for successful growth:
- Check the seed date, recommended depth, and moisture levels of compost: If your seeds are out of date, too low or high in the compost, or your compost is dry, this could contribute to poor germination.
- Pot your seedlings outside when their roots fill the cell: Root-bound seedlings could be caused when a plant stays in the small modules for too long.
- Provide strong light, cooler night temperatures, and repot as soon as possible: Leggy, weak seedlings are raised when conditions are too warm, there is insufficient light, or they stay inside too long.
- Keep a sowing calendar: Note the date you sowed each variety, germination, and when you pricked out; this helps next year’s planning.
- Start the most demanding crops indoors first: If your space is limited or you don't get much light in your home, start with the demanding crops, like tomatoes and peppers, and direct-sow the rest outside when the risk of frost has passed.
- Indoor-raised seedlings still need good outdoor soil: Well-prepared beds, rich in organic matter, and free of weeds, are essential to keeping your seedlings happy and thriving when they're transplanted outside.
Final Words: Growing Strong & Hardy Seedlings
Starting seeds indoors is a great way to start your gardening tasks early, ahead of the growing season in spring and summer, so we hope we've given you all you need to get growing!
Your own home-grown produce is right around the corner!
If you need any supplies, be sure to shop for some of our professional gardening equipment below, or browse our website for the exact tools you're looking for.
And, if you have any questions or need help starting your seeds indoors, please don't hesitate to contact us! With more than 60 years in the horticultural industry, we know a thing or two about how to grow seedlings!
*Free UK delivery is available on orders over £100.
FAQs
How Do You Start Tomato Seeds Indoors?
Sow tomato seeds indoors about 6–8 weeks before the last expected frost. Fill seed trays or small pots with moist, well-draining compost, and plant seeds about 0.5 cm deep.
Keep them in a warm, bright spot (around 18–21°C) or use a propagator to encourage germination.
Once seedlings have two true leaves, pot them on into larger containers and continue growing in bright light until it’s warm enough to harden off and transplant outdoors.
For more details on sowing seeds indoors, head to our blog post above!
When Should You Start Cucumber Seeds Indoors?
Cucumbers tend to grow pretty quickly, so to keep them thriving while they're outside, you should start them indoors a few weeks to a month before the last frost. This tends to be late February to early May in the UK.
Starting them indoors will not only protect them from harsh weather but from pests, too.
What is the Best Month to Start Seeds Indoors?
It generally depends on the type of seeds you have, and you should usually go by the instructions on the packet.
However, January–April tend to be excellent times to get your seeds started indoors before transplanting them out in your garden.
For more details on the best time to plant your seeds, head to the blog post above.
Is it Best to Germinate Seeds in Water or in a Paper Towel?
The paper towel method is actually better than simply germinating the seeds in water, because it provides a more stable growing environment on a solid medium, meaning you'll likely get more reliable, faster results.
Germinating seeds simply in water can be done to soften their coating and get them started, but the paper towel method combines the two, making it the better choice if you aren't germinating in soil.